


If you have an old, worn-out concrete surface that needs a facelift, overlaying it with a new layer of concrete is a cost-effective and practical solution. Concrete overlay not only improves the appearance of the existing surface but also adds strength and durability.
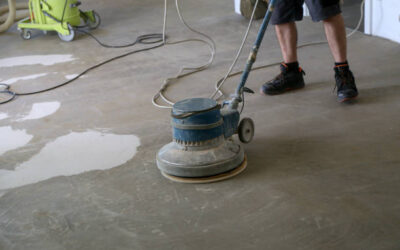
Step 1: Surface Preparation
Before overlaying concrete, it is crucial to prepare the existing surface properly. Start by cleaning the surface thoroughly to remove any dirt, debris, or loose particles. Use a pressure washer or a stiff-bristle brush to scrub the surface. If there are any cracks or holes, fill them with a concrete patching compound and allow it to dry completely. Smooth out any uneven areas with a concrete grinder.
Step 2: Bonding Agent Application
To ensure a strong bond between the old and new concrete layers, apply a bonding agent. This agent acts as a glue, improving the adhesion of the overlay to the existing surface. Follow the manufacturer’s instructions to apply the bonding agent evenly using a brush or roller. Allow it to dry for the recommended time.
Step 3: Mixing the Overlay Material
Choose a high-quality concrete overlay material suitable for the desired finish and strength. Follow the manufacturer’s instructions to mix the overlay material with water. Use a mixing paddle attached to a drill for consistent mixing. Make sure to achieve a smooth, lump-free consistency.
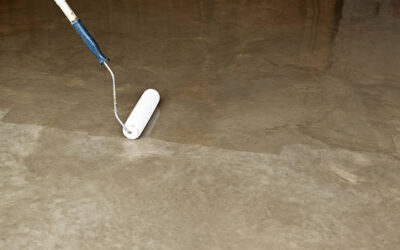
Step 4: Applying the Overlay
Start by dampening the existing concrete surface with water. This will prevent the old concrete from absorbing moisture from the overlay too quickly, ensuring better adhesion. Next, use a trowel or a long-handled squeegee to apply a thin layer of the overlay material onto the dampened surface. Work in small sections to ensure an even application.
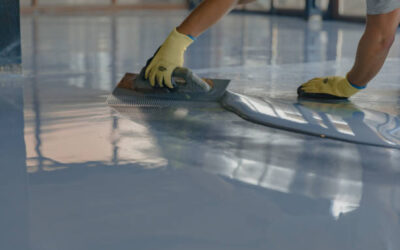
Step 5: Smoothing and Leveling
Once you have applied the first layer of overlay material, use a concrete float or a trowel to smooth and level the surface. Pay attention to achieving an even thickness throughout. Continue this process until the entire surface is covered. If you desire a textured finish, use a broom or a texture roller to create the desired pattern.
Step 6: Curing and Finishing
After completing the overlay application, cover the surface with a plastic sheet or a curing compound to prevent rapid moisture loss. This will allow the overlay to cure properly, ensuring maximum strength and durability. Follow the manufacturer’s instructions for the curing time. Once the overlay has cured, you can proceed with any desired finishing touches. This can include staining, coloring, or sealing the surface to enhance its appearance and protect it from future damage. Consult with a professional to determine the best finishing options for your specific project.Overlaying concrete is a practical and cost-effective way to transform an old, worn-out surface into a beautiful, functional space. By following these step-by-step instructions, you can successfully overlay concrete and create a durable, aesthetically pleasing surface. Remember to take your time during each step, ensuring proper surface preparation, mixing, and application techniques. With patience and attention to detail, you can achieve outstanding results and enjoy your revitalized concrete surface for years to come.
0 Comments